Accessing the Web RADWorklist
1. Log into your account through the DVMInsight RadPortal.
2. Select Web RADWorklist from the Productivity menu.
Web RADWorklist Overview
Reader: Displays which DVMInsight Reader account you are logged in with. Click LOGOUT to log into a different account or when you are finished reading cases.
Downloading to: Displays the computer or system name with the DVMI Downloader Nickname in parentheses. It is important to confirm this information if you are using multiple computers to read cases.
Web RADWorklist Buttons: See more information below.
Web RADWorklist Tabs: See more information below.
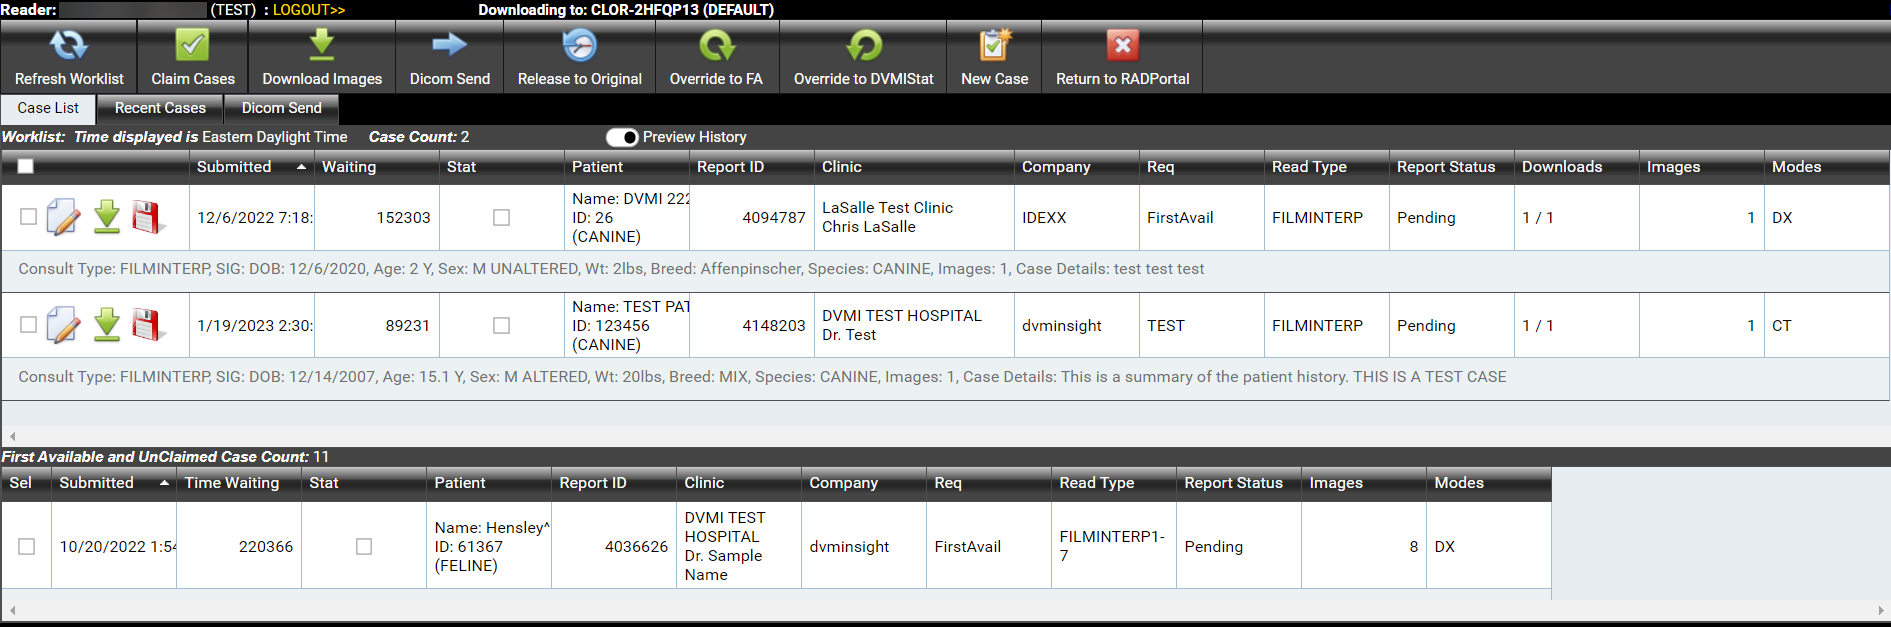
Worklist: The top section displays a list of cases that you claimed or were submitted directly to you.
First Available and Unclaimed Cases: The bottom section displays a list of cases submitted to First Available from all the companies you are associated with on DVMInsight.
Web RADWorklist Buttons

Refresh Worklist: Click to manually refresh both of the case lists.
Claim Cases: Move cases selected (check box on left) from the First Available case list to your Worklist.
Download Images: Download images from one or more selected cases in your Worklist using the DVMI Downloader.
Dicom Send: Send images from one or more selected cases in your Worklist to another server destination.
Release to Original: Releases the selected cases in your Worklist to the original location, usually the First Available case list.
Override to FA: Overrides the selected case(s) in your Worklist to the First Available case list for the company.
Override to DVMIStat: Overrides the selected case(s) in your Worklist to DVMIStat.
New Case: Create a new report case without images, typically used for in house imaging reports such as ultrasounds.
Return to RADPortal: Navigates to your RadPortal homepage.
Web RADWorklist Tabs
Case List

-
To select all cases in your Worklist, check the box on the left side of the Worklist column headers.
- You can reorder the case list by clicking on one of the column headings.
Case Count: Displays a total count of the cases in your Worklist.
Preview History: Toggle this on to see the consult type, patient signalment, and a brief summary of the patient history in both case lists.
Case Icons:
 |
Type Report |
Opens the reporting window for the case so you can view the entire patient history and write a report or addendum |
 |
Add to Downloader |
Downloads the images associated with the case to your DVMI Downloader folder. |
 |
Get Zip File(s) |
Downloads a compressed file of images in .zip format to manually extract and open in your preferred viewer. |
Recent Cases

The date range automatically defaults to include the current date and a couple days prior. You can adjust the date range depending on the case dates you are searching for.
Enter text in the search box to filter results, then click the Search link. Click the Clear link to remove text from the search box.
Click the Pencil and Paper icon (Amend Report) to add and addendum to the report.
Dicom Send

Displays a list of cases that are Outgoing or Completed to another server destination through Dicom Send.
Web RADWorklist Case Buttons

Load: Reload a previous draft of this report.
Spell Check: Built-in Spell Checker. Words can be changed, ignored or added to the dictionary.
Zoom: Increase, decrease, or reset the text size in the report fields.
Contact Info: Displays the contact information for the submitting clinic, in case they need to be contacted with a question on the case submission.
Search: Checks for linked or unlinked possible reference cases. This is the same functionality as the “Other Cases” tab in the reporting area (more details at the end of this article).
Launch Viewer: Launches the free DICOM viewer Weasis. Please see THIS ARTICLE for more info on downloading and using Weasis.
Duplicate Submission: Cancel a case. This can be used for a true duplicate, or to cancel a case for any reason (ex: customer no longer wants a report).
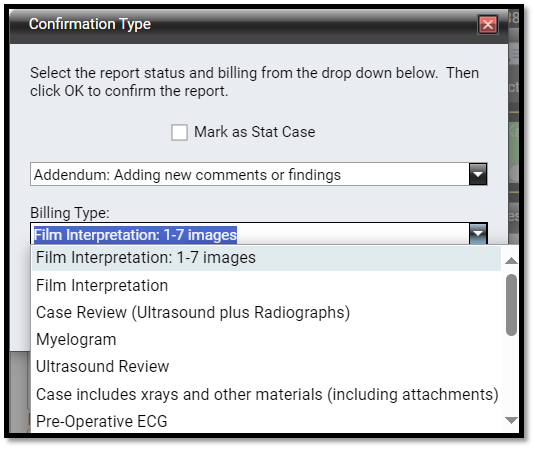
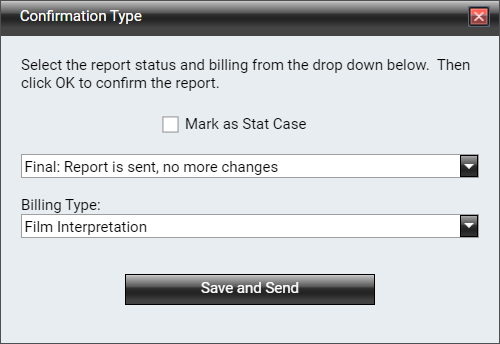
Confirm/Amend: Use the Confirm button to finalize a report, and the Amend button to finalize an amendment. After clicking Confirm, a confirmation window will pop up.
In this window you can:
- Change the case to Stat by checking the “Mark as Stat Case” box, or remove the Stat fee by un-checking it.
- Change the confirmation type:
(Default value) Final: Report is sent, no more changes. This sends the final report to the clinic and locks the report for editing. Any further changes would need to be done via amendment.
- Draft: Report is NOT sent. This closes the report and saves a draft of the report without sending to the clinic. The report remains editable. To re-access drafts saved this way from the worklist, click the “Recent Cases” tab, then the pencil and paper icon “Amend Report.” Generally, using the “Save” button then “Return to Worklist” is the preferred method of saving a draft, as this keeps the case in the reader’s worklist for easy access.
- Preliminary: Report is sent, changes allowed. This sends a preliminary report to the clinic, but the report is still editable. Please ensure the clinic is aware the report is not final. This could be used in cases where bloodwork or additional info is pending but preliminary results of imaging is needed for immediate patient care.
- Addendum: Adding new comments or findings. This should only be used when adding an addendum to a finalized report.
- Change the billing type:
- Adjust to match the type of images submitted, if necessary.
Return to Worklist: Exit the case and return to the worklist. Report is not sent to the client.
Reporting Cases using the Web RADWorklist
The following is a general overview of providing an case report in the Web RADWorklist.
1. Log into the DVMInsight RadPortal and select Web RADWorklist from the Productivity menu.
2. To download images and report cases, they need to be in your Worklist. To claim cases, select cases in the First Available case list then click the Claim Cases button to move them to your Worklist.
3. Download the case images in your Worklist by clicking the Add to Downloader icon for one of the cases in your Worklist or select multiple cases in your Worklist then click the Download Images button.
4. Write the report for a case by clicking the Type Report icon.
5. The page will refresh to display the reporting window. Complete the Findings, Conclusion, and Recommendations.
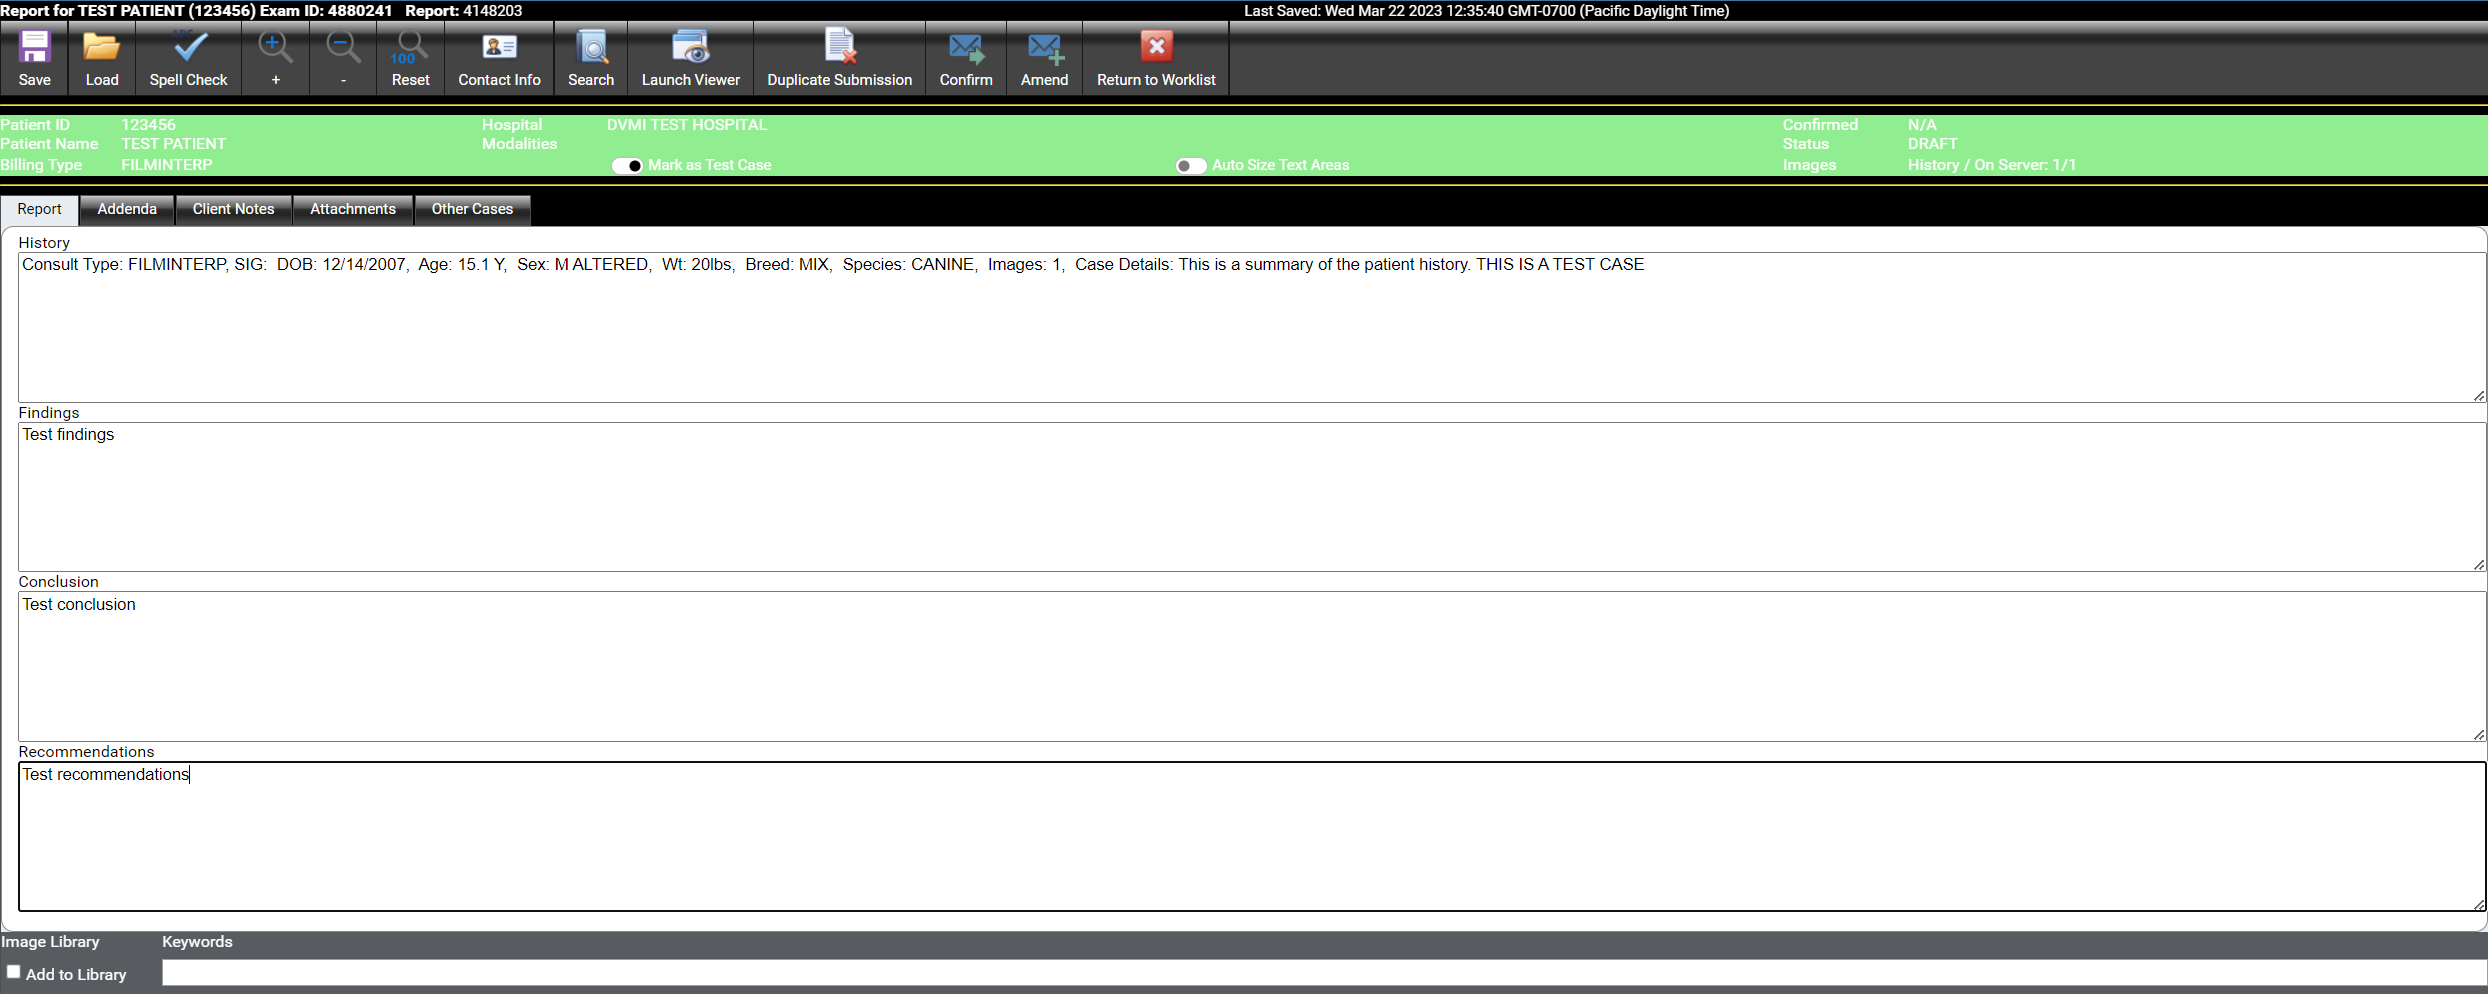
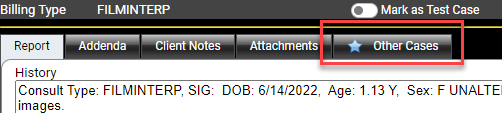
6. Additional tabs on this page will have a blue star icon if they contain information.
Addenda: Shows any previous addenda; allows typing of a new addendum on completed reports.
Client Notes: Client Notes are messages from the client to the radiologist, they do not appear on the report:
Attachments: These are usually not images, but other types of files. Most commonly they are DOCs or PDF's that the client feels are relevant to this case.
Other Cases:
Linked Reference Cases: Cases linked by the clinic for reference. Will be empty if the user did not link any cases.
Possible Other Cases for this Patient: Cases identified by DVMInsight as possible matches, based on Patient ID, Name, etc. These may or may not be images for this patient. Please check carefully.
Note: Linked reference case images should automatically download along with case images. Non-linked case images can be downloaded using the Zip icon.
7. When the report is completed and ready to send to your client, click the Confirm button. In the Confirmation pop-up window, confirm or make changes to the report status and billing type, then click Save and Send.
8. Wait for the page to refresh and display your Worklist. Note that the case you just confirmed has moved from your Worklist to the Recent Cases tab.
DVMInsight Learning
Comments