Based on best practices for veterinary imaging, it is strongly recommended that you submit images in DICOM, or .dcm format, through a direct transfer between servers. The DICOM format provides the best quality and diagnostic image to your company for interpretation. The direct transfer of these files from your imaging or image storage system also reduces the quantity of steps for you to successfully submit a report request to your company.
It is possible manually upload images to create a case in your DVMInsight account based on the image file format,
- Upload DICOM Images for all DICOM or .dcm file formats, including ultrasound videos.
- Upload JPG or Other Images for all JPG, BMP, TIF, and PNG file formats.
Upload DICOM Images
To upload images in DICOM format,
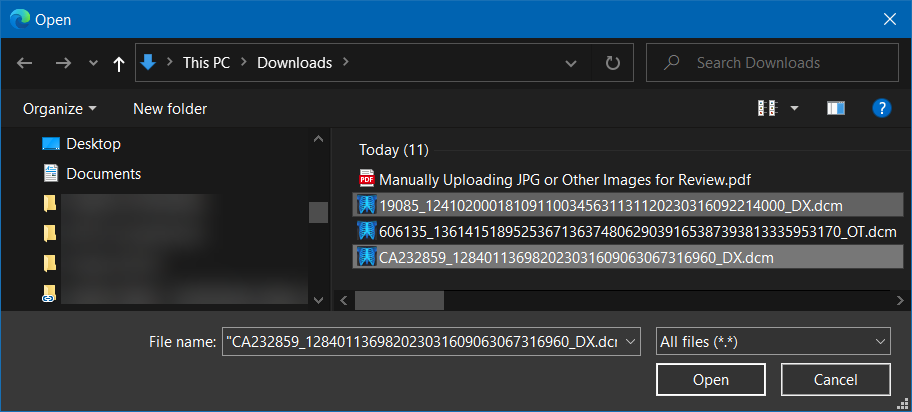
1. In your DVMInsight account, navigate to the Upload DICOM Images button from the bottom of the Submit Request page or by selecting Upload DICOM Files from the Review My Cases drop-down menu.
2. Click the Select Files to Upload button.

3. Browse the file location and select ALL of the files for upload. If you do not select all of the files for uploading at once, it may create more than one case or overwrite the images. There are a few ways to select multiple images,
- Use the CTRL+A keys to select all of the files in the location.
- To select files that are in order, click to select the first file in the list then press and hold the SHIFT key and click to select the last file in the list. All files in between the first and last will be highlighted for upload.
- To select files that are not in order, press and hold the CTRL key then click each file once to highlight or select it for upload.
4. Once all the files for uploading have been selected or highlighted, click Open to begin the upload.
5. Once the page refreshes and the upload is completed, navigate to the Submit Request page to request a report on the uploaded images.
Upload JPG or Other Images
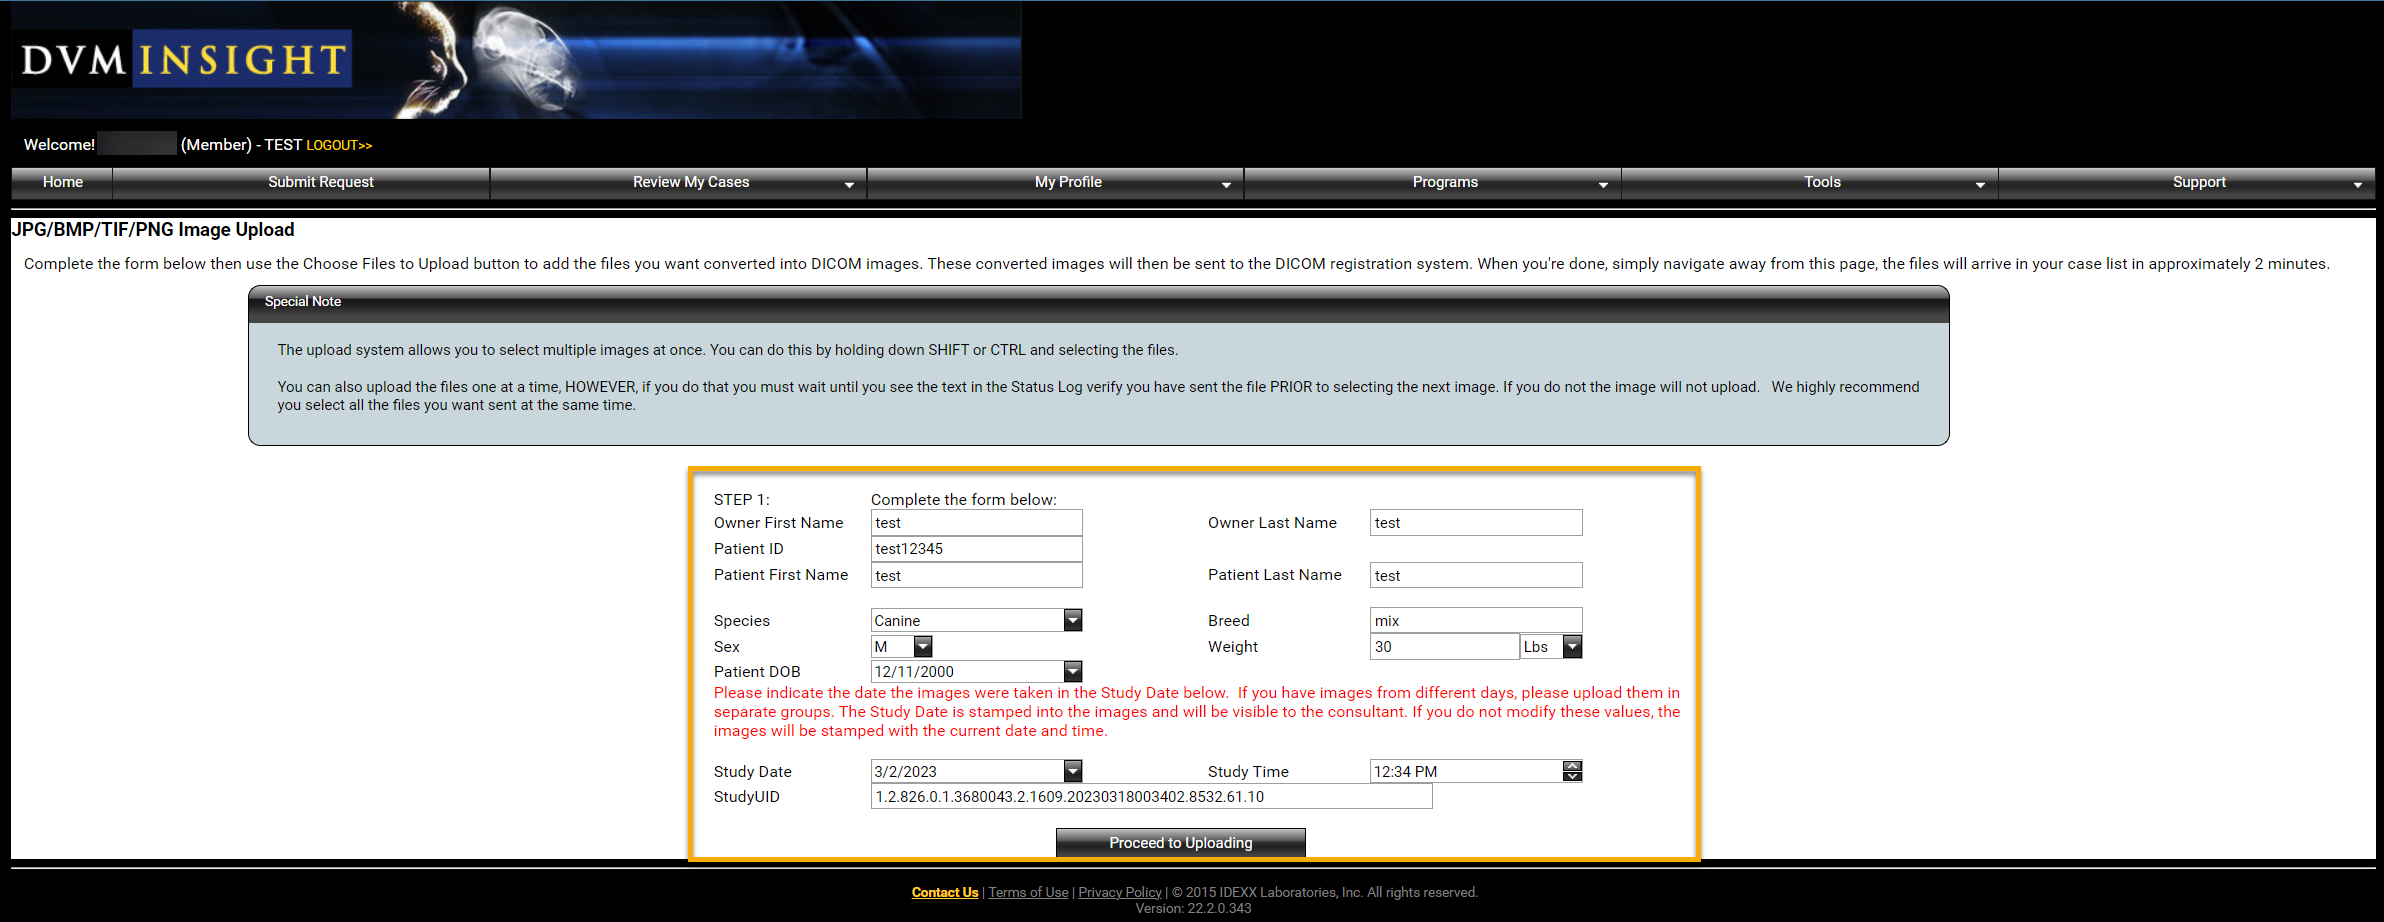
To upload images in JPG, BPM, TIF, or PNG format,
1. In your DVMInsight account, navigate to the Upload JPG or Other Images button from the bottom of the Submit Request page or by selecting Upload JPGs. BMPs from the Review My Cases drop-down menu.
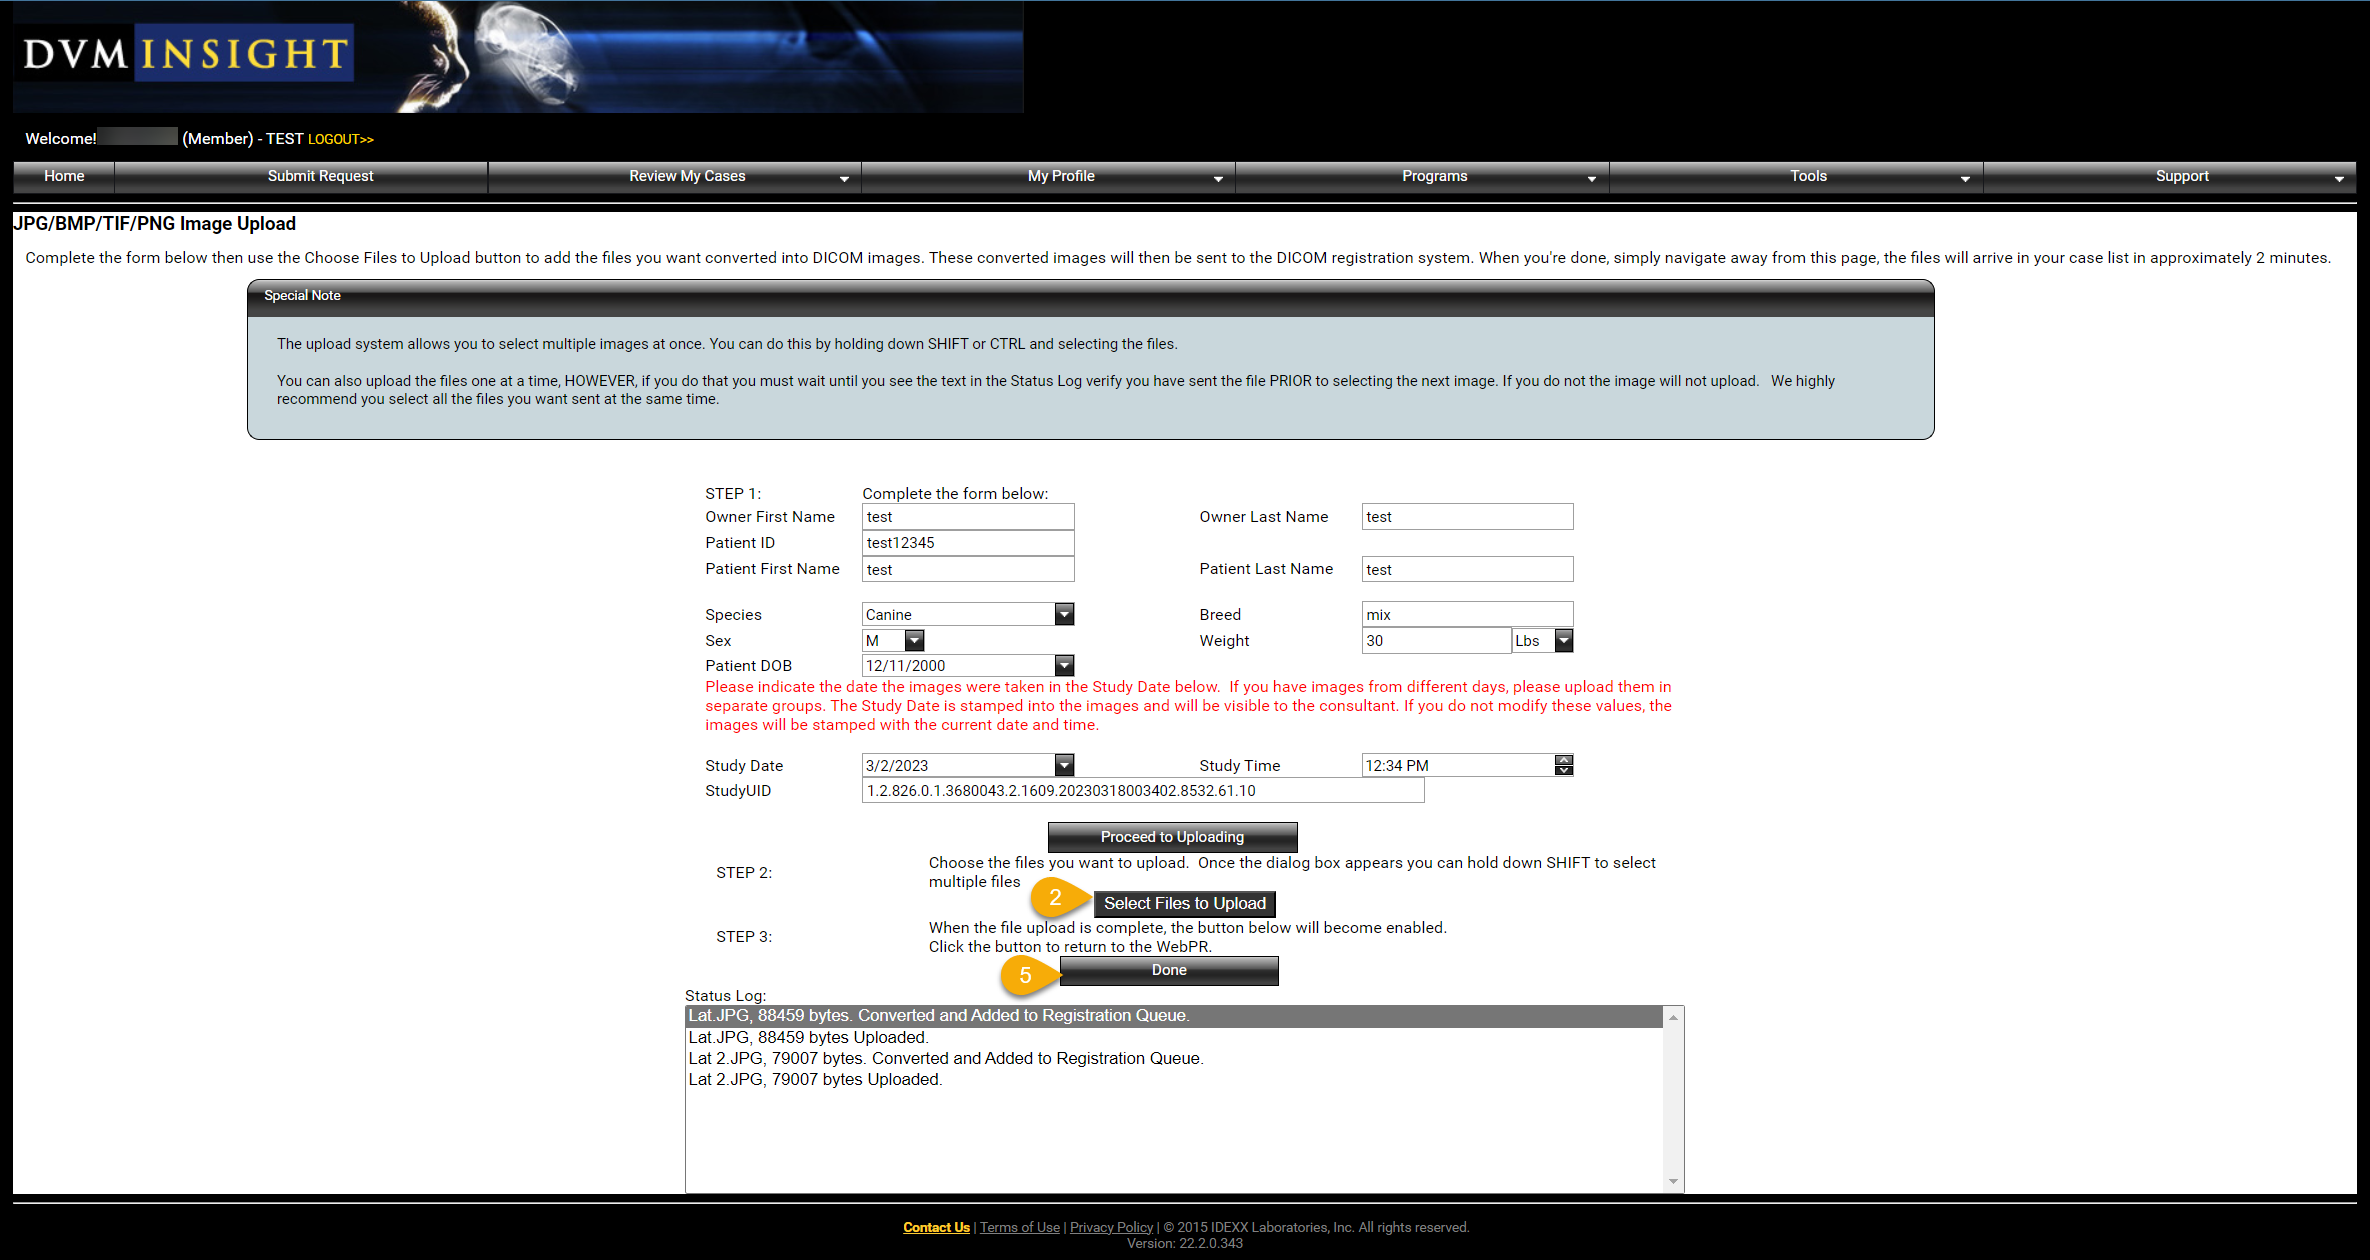
2. Complete the patient information form in Step 1, then click Proceed to Uploading.
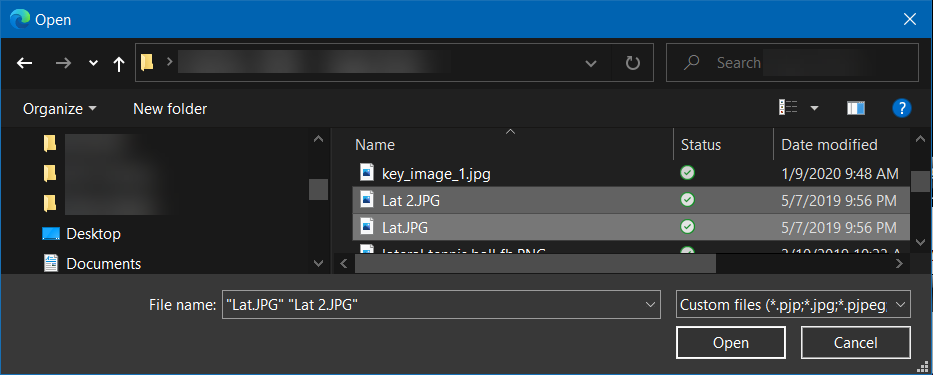
3. Click Select Files to Upload in Step 2, then browse the file location and select ALL of the files for upload. If you do not select all of the files for uploading at once, it may create more than one case or overwrite the images. There are a few ways to select multiple images,
- Use the CTRL+A keys to select all of the files in the location.
- To select files that are in order, click to select the first file in the list then press and hold the SHIFT key and click to select the last file in the list. All files in between the first and last will be highlighted for upload.
- To select files that are not in order, press and hold the CTRL key then click each file once to highlight or select it for upload.
4. Once all the files for uploading have been selected or highlighted, click Open to begin the upload.
5. Once the page refreshes and the upload is completed, click Done then navigate to the Submit Request page to request a report on the uploaded images.
DVMInsight Learning
Comments